Creating a Custom Root by Patching SuperSU
• • ☕️☕️ 12 min readDefinitions
Rooted device - For the purpose of this blog post, this is defined as: modifying the operating system so that you can run commands as the root user. There are broader definitions that include anything that is not stock Android, such as custom ROMs, however, this is outside the scope of this post.
Root Detection - Logic used to detect the presence of a rooted device. For example, the presence and or absence of files on the filesystem, binary behavioural differences, etc.
Introduction
Dynamic security testing / research on the Android platform is almost always accomplished on a rooted device. This is because having root privilege access allows you to bypass many restrictions that are built into the platform. Making it easy to extract data from the device or tamper with applications. However, many mobile applications take it upon themselves to block access from rooted devices. This is common practice because the user has introduced a mechanism to bypass restrictions that are rightfully built into the platform. These restrictions are there to protect the user, and their data. Naturally, service providers want to reduce the potential attack surface as much as possible, blocking rooted devices is the easiest solution for that in this case.
The alternative is to use a non-rooted device, however, this is not as easy as it sounds. Although there are methods to use bread and butter tools on non-rooted devices, such as Frida, generally it is more cumbersome. From my experience, it often adds additional complexity and can introduce more problems than it solves. Especially when working with multiple applications. A great example of this is: to be able to use Frida Gadget you need to repackage the application. However, by repacking the application, you now need to bypass APK signature detections. This can often go on and on, like Hal trying to replace a lightbulb.
The way that I usually handle this dilemma is by biting the bullet and using a rooted device. Bypassing any root detection controls that get in the way. Fortunately, there are many tools that offer effective root bypasses that work on most applications, such as Objection and Magisk Hide. Unfortunately, these tools are not always effective, many sophisticated applications are not so easily defeated. When this happens you’re forced to manually reverse the application and write a custom hook / patch it statically. Depending on the obfuscation and tamper resistance of the application, this can be extremely time consuming. This is pretty much the worst case scenario.
The purpose of this post is to present an alternative solution that bypasses most root detection methods. Instead of writing a series of hooks to try and hide common root signatures, I have simply changed the signatures in the root itself. The aim of this is to help prevent the worst case scenario and improve your quality of life when it comes to testing hardened applications.
Background
There are many different methodologies / approaches when it comes to root detection. For the purposes of this post, it is important to understand that many root detection methodologies are primarily built on detecting the presence of files on disk. For example, detecting the presence of the su binary on disk, or a root management application such as SuperSU or Magisk. If a device has these files on disk there is very little ambiguity, the device is almost certainly rooted.
Notably, there are additional methods for detecting if a device is rooted that are not so straight forward. Such as checking file system permissions, system properties, or even how the OS was signed (test / prod keys). Many of these checks are not individually enough to say the device is definitely rooted. For example, it is not uncommon for custom ROMs to be signed using test keys, or ROMs to ship with different utilities. Often these checks are only used to support the file system checks to provide further assurance and avoid false positives.
The point I’m trying to highlight here is that hiding the su binary and any associated binaries is the 200iq play.
A more in depth breakdown of the individual techniques can be found in the MSTG - Testing Root Detection gitbook. This is a great resource and I would highly recommend it.
Walkthrough
This section breaks down taking the SuperSU framework, patching it to modify any common signatures, flashing it onto a device, and cleaning up any loose ends. For the purposes of this post, the device is a OnePlus 5T. This has not been tested on any other device so proceed with caution.
Disclaimer
Before proceeding please acknowledge that rooting your Android device is your decision, I am by no means responsible for any damage. The process of Rooting a device can be risky, including but not limited to:
- Bricking the device, rendering it unusuable
- Voiding the device warranty
- Introducing additional security risks
Setup
Firstly, make sure the host machine and test device have the required settings / official Android utilities to be able to proceed.
The host machine you are using to interact with the test device has the necessary tools. This includes the
adbandfastbootutilities that are shipped with the android platform tools package. These tools provide a convenient mechanism of interfacing with Android devices.The test device’s bootloader is unlocked, this is required to be able to flash third-party software onto the device. Keep in mind that unlocking the bootloader will delete any user data on the device. This can be done in the
Developer optionsmenu in theSettingsapp.
Secondly, get the required third-party tools, this includes a tool to flash third-party firmware onto an Android device, and a version of SuperSU.
For flashing third-party firmware onto the device, I’m going to use TWRP. This tool provides support for many devices, however, the OnePlus5T (Dumpling) build did not work for me. I opted to use an unofficial version by Codeworkx found here.
For the SuperSU version, I used SuperSU v2.82 SR5.
Applying the Patch to SuperSU
Patching each signature by hand is extremely error prone and boring. To speed up the process, I have written a tool that takes a SuperSU archive, patches each of the files, and repackages it ready to be flashed onto a device. This tool is called supersu-patcher, or SuperNU, it is open source and publicly available here.
Firstly, clone the repository:
git clone git@github.com:arbitraryrw/supersu-patcher.git
Browse to the directory and install the required python dependencies. I would recommend using a virtual envionrment. In addition, install Radare2 as the r2-pipe python package depends on this system utility, this is not documented in this post but instructions are available here.
cd supersu-patcher
python3 -m pip install -r requirements.txt
Run supersu-patcher against the supersu archive to apply the patches.
python3 run.py -i ./SR5-SuperSU-v2.82-SR5-20171001224502.zip
This should produce the following output, renaming any reference of su to nu.
___________________________________
|---------SuperSU Patcher---------|
|--------------------v0.1---------|
‾‾‾‾‾‾‾‾‾‾‾‾‾‾‾‾‾‾‾‾‾‾‾‾‾‾‾‾‾‾‾‾‾‾‾
Starting core logic..
[I] Patching File :: /unzipped-SR5-SuperSU-v2.82-SR5-20171001224502.zip/arm64/libsupol.so
[i] Patching using init_patch_dict
Patching ::
    From -> /.supersu
    To -> /.supersu
Searching 9 bytes in [0x615d0-0x624c0]
hits: 0
Searching 9 bytes in [0x609e8-0x615d0]
hits: 0
Searching 9 bytes in [0x0-0x501c8]
hits: 0
Patching ::
    From -> /system/xbin/su
    To -> /system/xbin/nu
Searching 15 bytes in [0x615d0-0x624c0]
hits: 0
Searching 15 bytes in [0x609e8-0x615d0]
hits: 0
Searching 15 bytes in [0x0-0x501c8]
hits: 0
Patching ::
    From -> /system/xbin/daemonsu
    To -> /system/xbin/daemonnu
...
Once the patching has completed, this should produce the following directory structure containing the patched archive in the output directory.
supersu-patcher » tree -L 2
.
├── LICENSE
├── README.md
├── output
│   ├── copy-SR5-SuperSU-v2.82-SR5-20171001224502.zip
│   ├── patched-SR5-SuperSU-v2.82-SR5-20171001224502.zip
│   └── unzipped-SR5-SuperSU-v2.82-SR5-20171001224502.zip
├── requirements.txt
├── run.py
└── src
    ├── core
    └── utils
Installation
The next step is to flash the patched SuperSU archive onto the test device. Connect the test device to the host machine that was previously set up with the required tools / utilities. Once connected, verify the device is visible by running adb devices. If it is visible, then execute the following command to boot the device to the bootloader.
adb reboot bootloader
Once the device has booted into the bootloader menu it should be visible using the fastboot utility. Execute the following command to verify the device is visible.
fastboot devices
<hash>  fastboot
Boot the device into the TWRP image downloaded previously by executing the command below. Notably, this can take some trial and error to find a working image, you may have to resort to using an unofficial image like I did.
fastboot boot twrp-3.2.3-0-20180822-codeworkx-dumpling.img
Sending 'boot.img' (26944 KB)                      OKAY [  0.599s]
Booting                                            OKAY [  0.013s]
Finished. Total time: 0.636s
You should see the TWRP splash screen on the test device if everything was successful. If not, you will see a black screen, simply reboot the device. Assuming everything was successful, run adb devices to confirm you are able to communicate with the device. If so, push the patched SuperSU archive onto the device as seen below.
adb push patched-SR5-SuperSU-v2.82-SR5-20171001224502.zip /sdcard/
patched-SR5-SuperSU-v2.82-SR5-20171001224502.zip: 1 file pushed, 0 skipped. 28.8 MB/s (14913677 bytes in 0.494s)
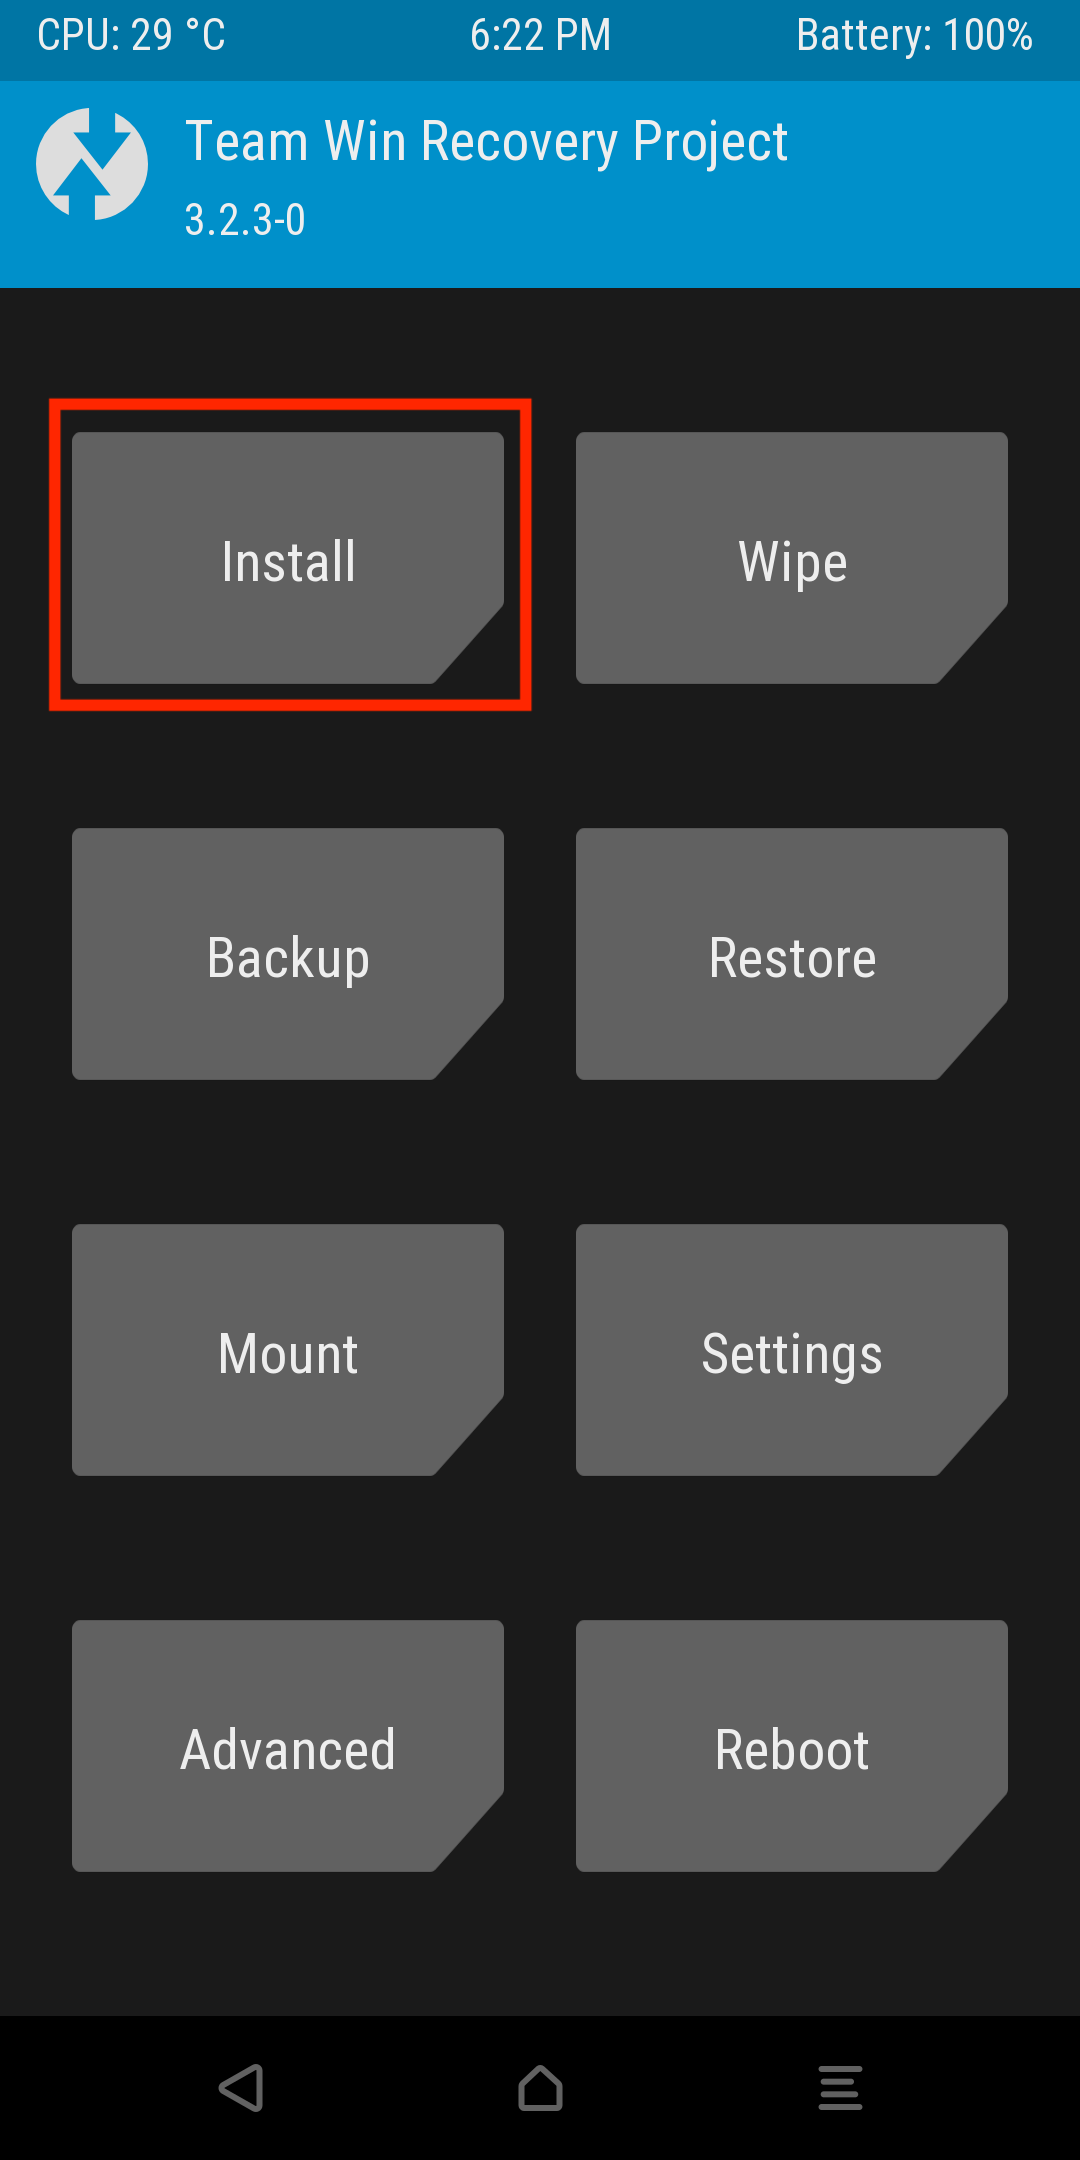
On the test device, navigate to the install function in the TWRP menu.
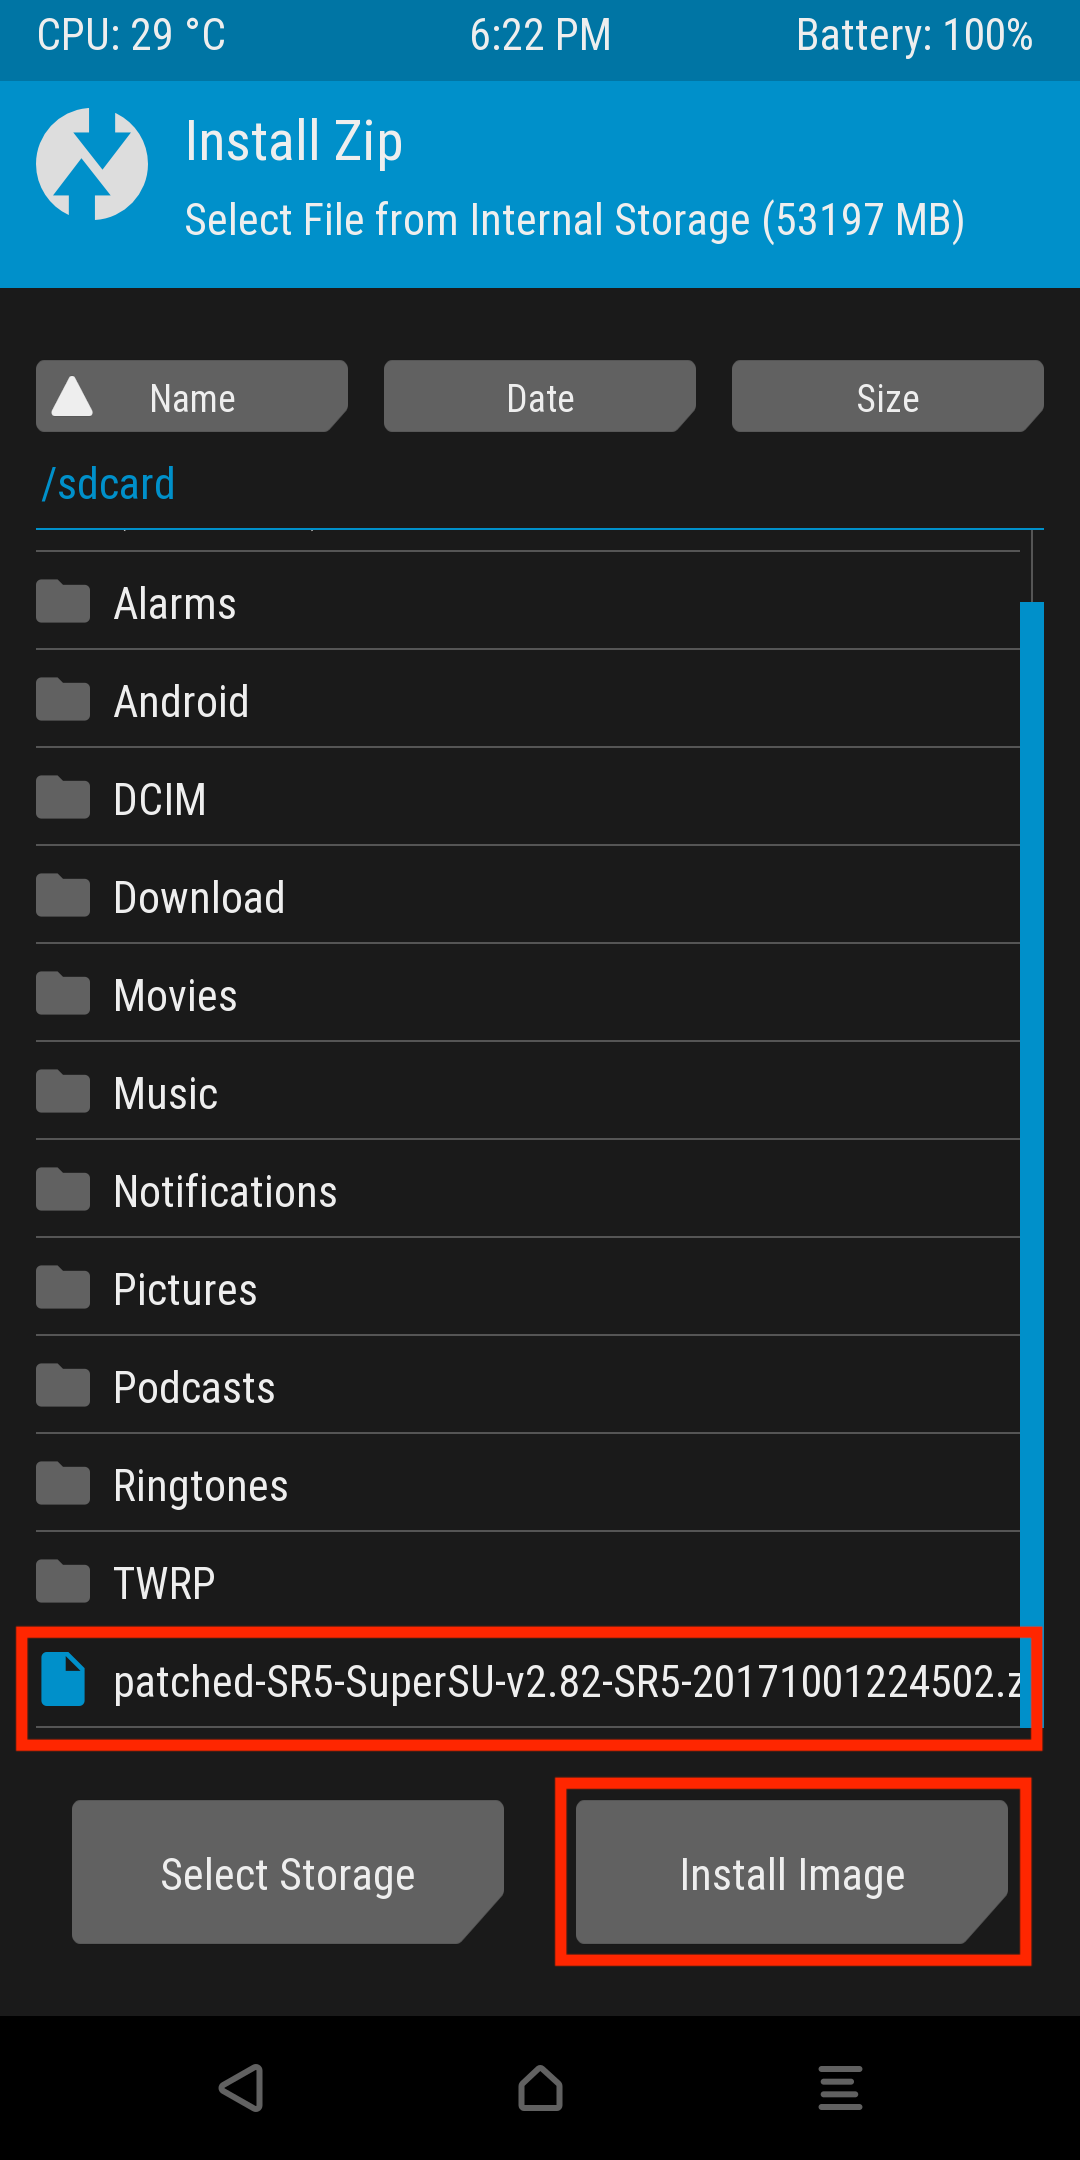
Next select the patched zip archive that was previously pushed onto the device, and select Install image.
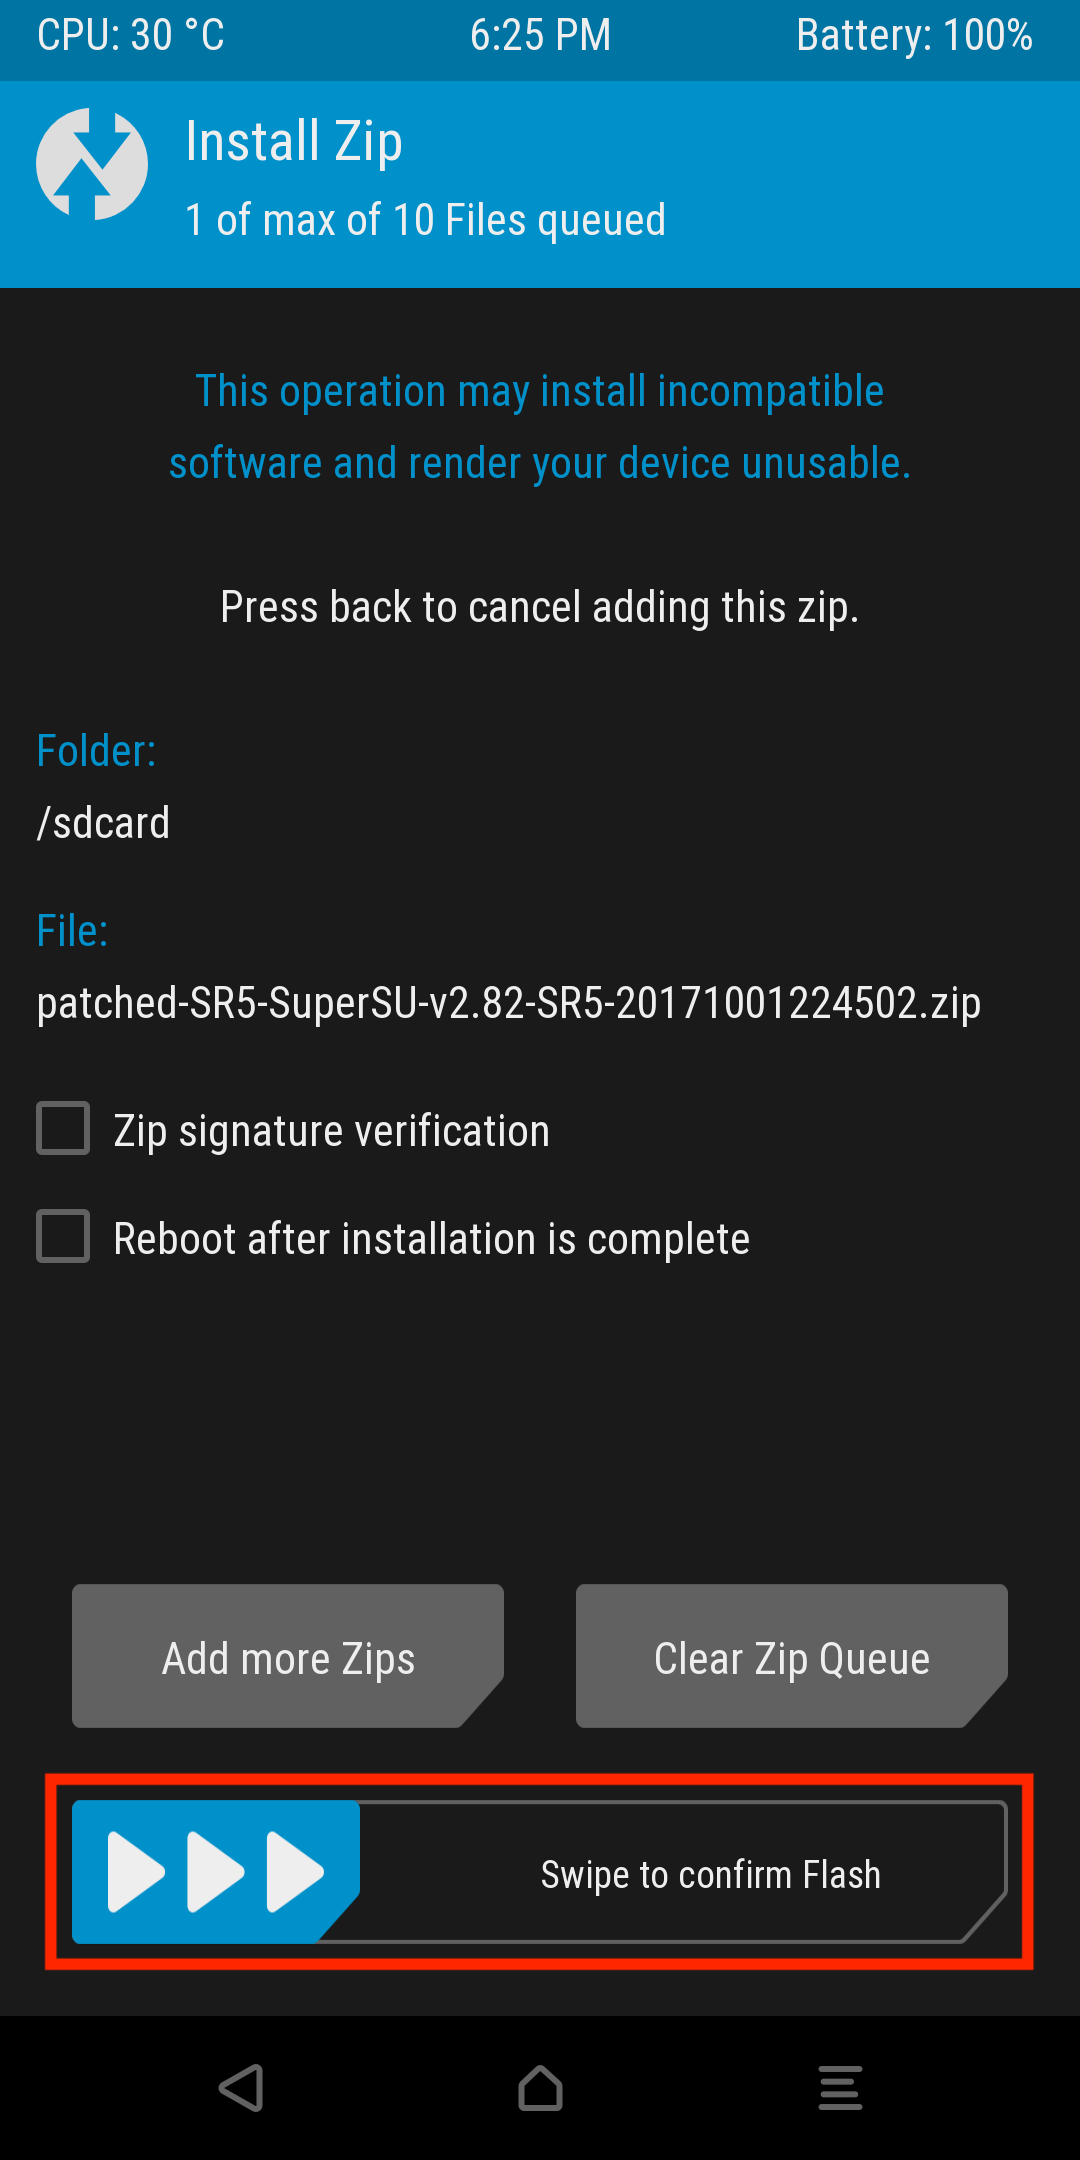
This should redirect you to a confirmation screen, confirm the installation by swiping the slider.
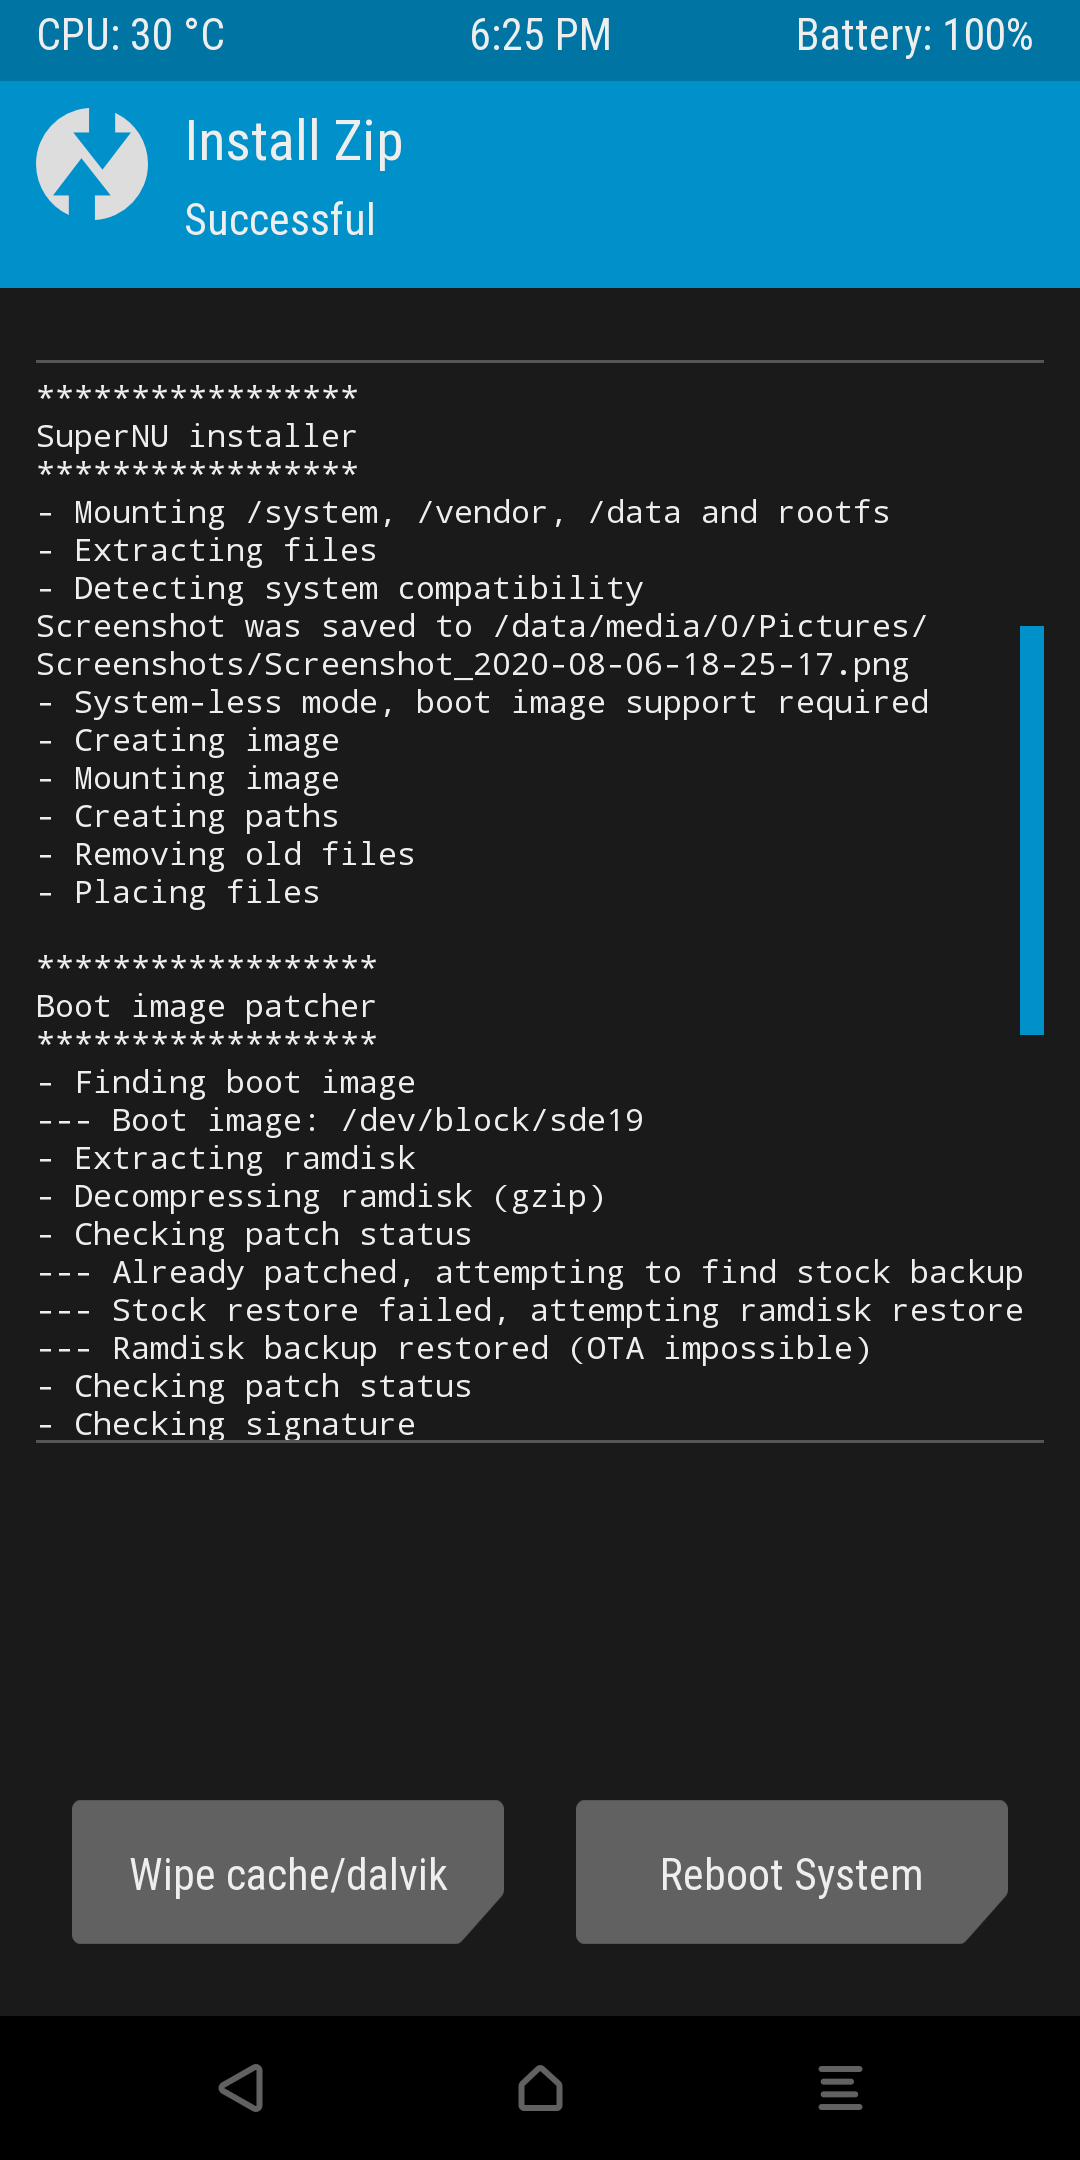
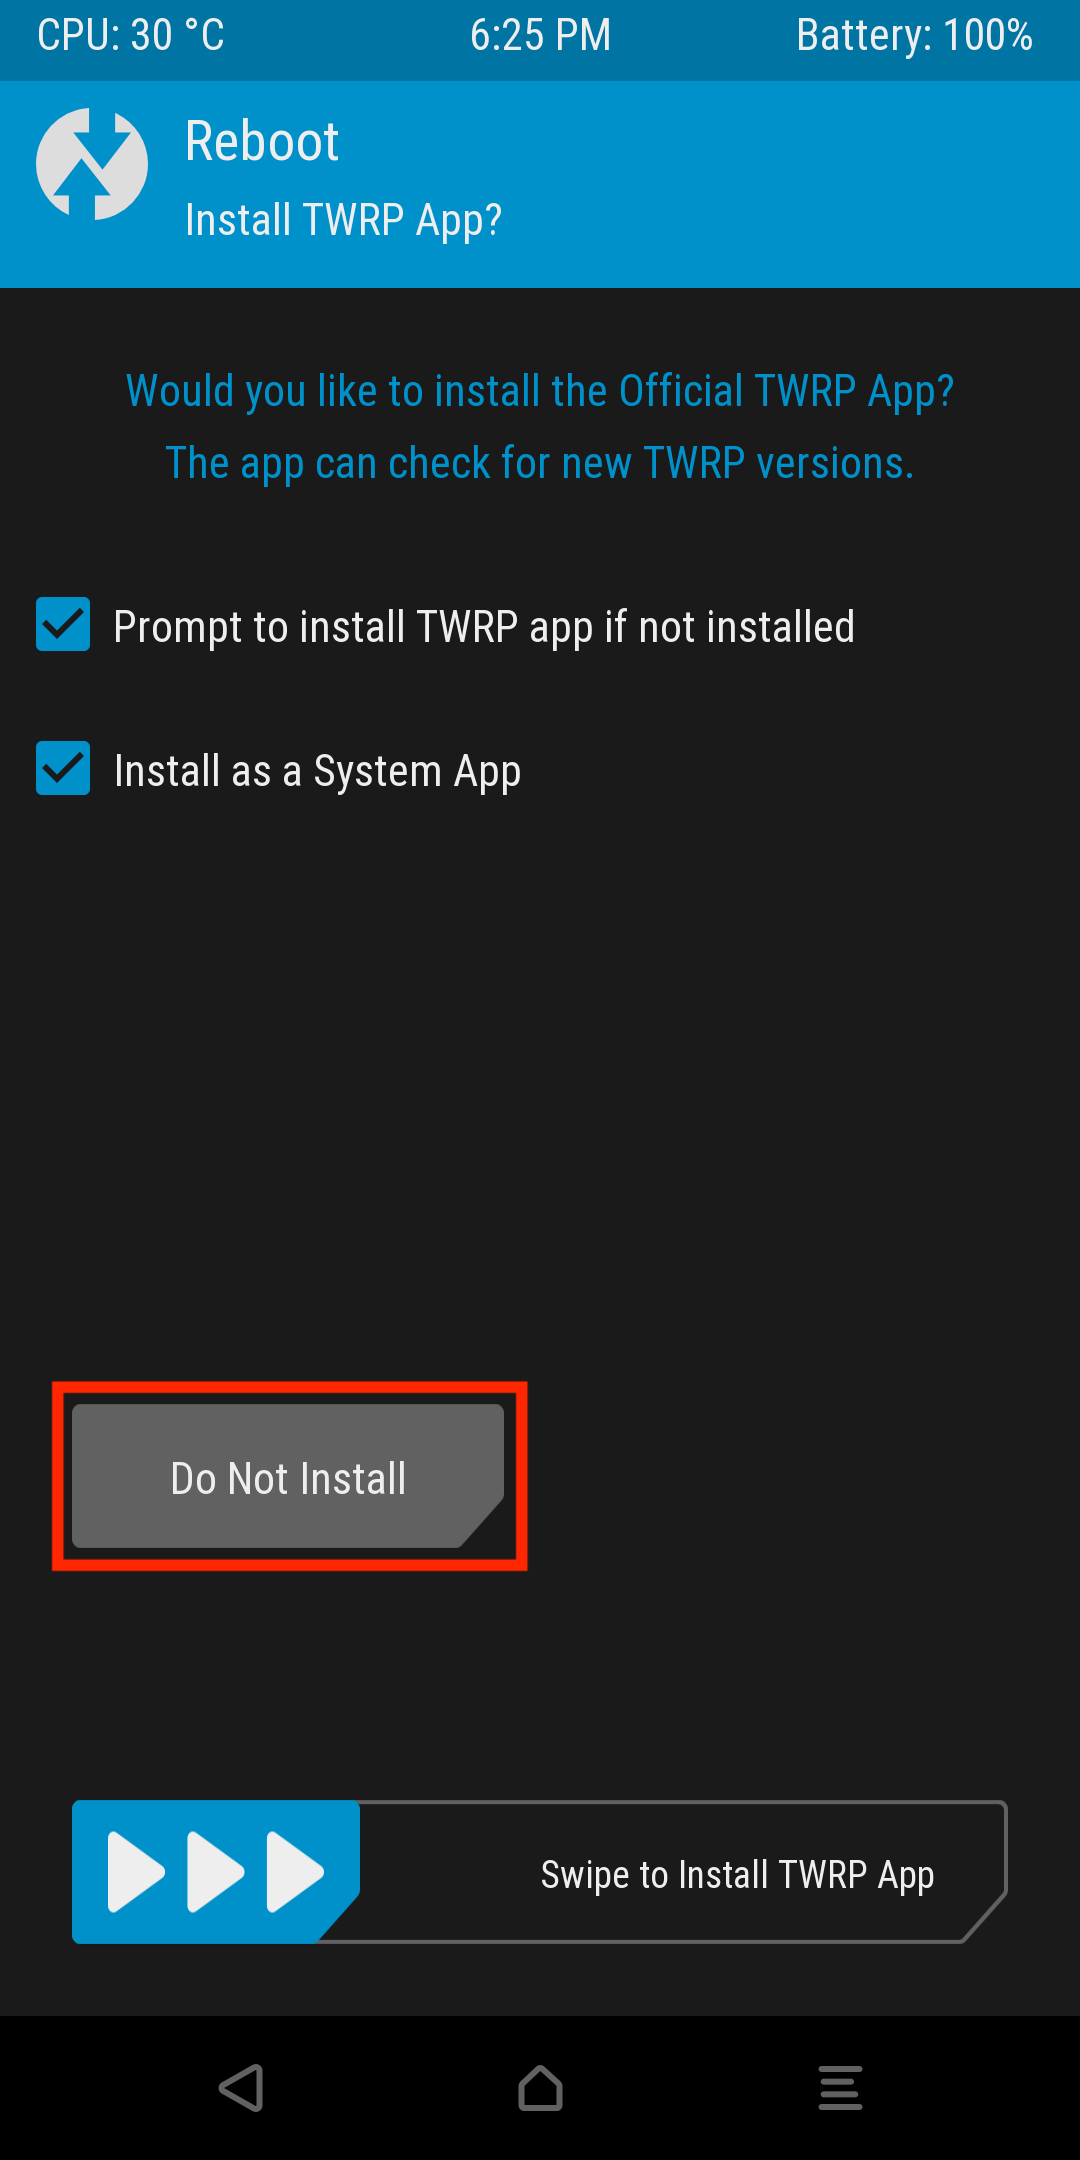
This will then begin the installation, you should see the installation logs below. Press the Reboot System button once everything is complete.
Finally, press the Do Not Install button. I would recommend not installing the TWRP app for detection purposes. This introduces another unnecessary signature and defeats the purpose of this exercise.
Results
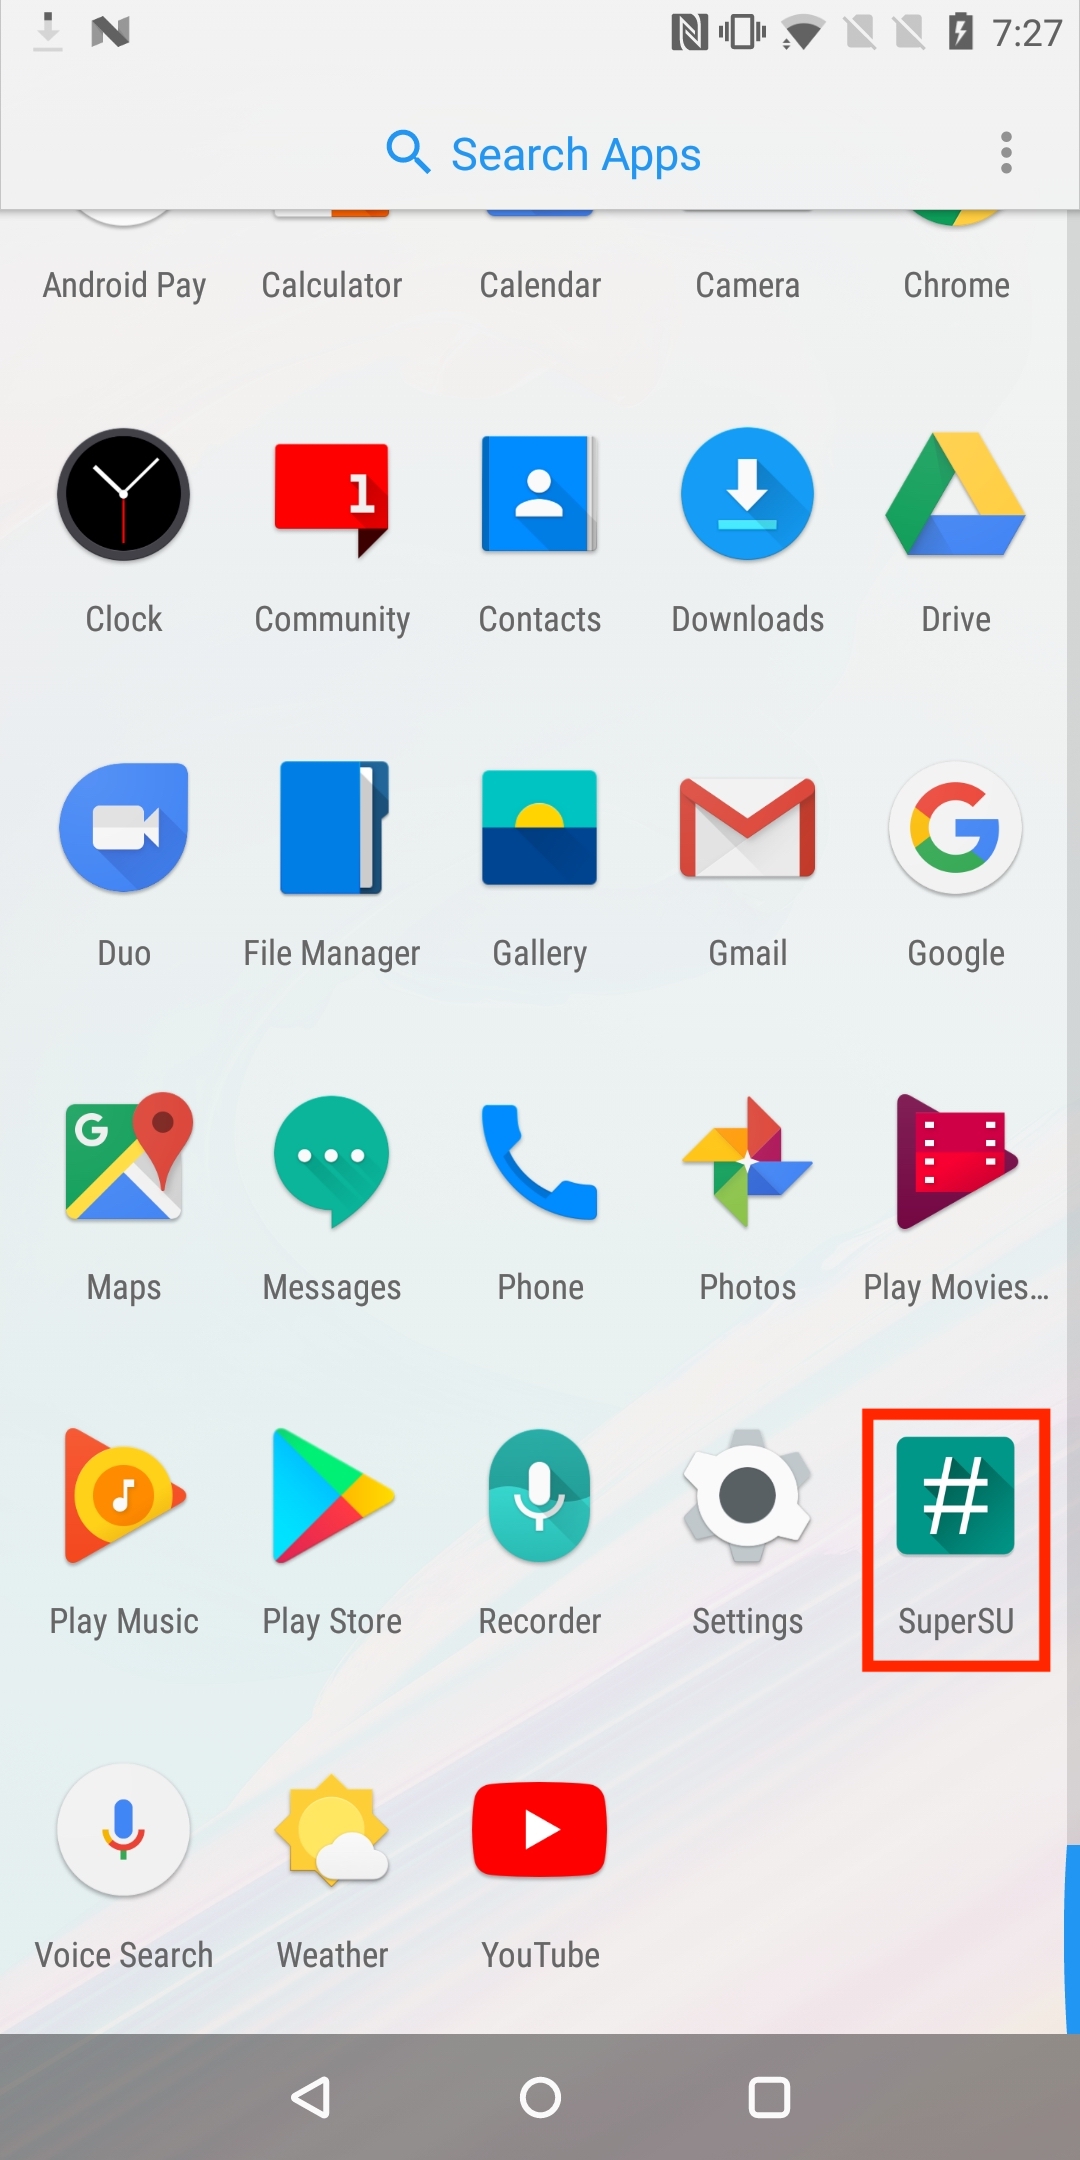
Once the device is rebooted, you should see that the SuperSU application present in the device application list.
The real test is are you able to gain root user access. Connect to the device via adb and verify that you can access the root user as seen below.
adb shell
OnePlus5T:/ $ su
/system/bin/sh: su: not found
127|OnePlus5T:/ $ nu
OnePlus5T:/ # whoami
root
OnePlus5T:/ # exit
OnePlus5T:/ $ whoami
shell
To double check everything is working, as the root user bypass the device sandbox restrictions and access an application’s sandbox data.
OnePlus5T:/ # ls /data/data/com.oneplus.security/
cache code_cache databases shared_prefs
OnePlus5T:/ # cat /data/data/com.oneplus.security/shared_prefs/oneplus_security_preference.xml
<?xml version='1.0' encoding='utf-8' standalone='yes' ?>
<map>
    <int name="permission_switch" value="1" />
</map>
OnePlus5T:/ #
Clean-up
At this point the patched root is working and you’re now able to access the root user using the patched nu utility, instead of the conventional su utility. However, there are still a few loose ends that need to be cleaned up. For example, the SuperSU management application is still present, this is an extremely common signature for root detection. I would highly recommend removing the management application because of this. In addition, the management application is not even aware of the root so it serves no purpose.

Another problem with this setup is that as it currently stands it will fail the SafetyNet API checks, for context:
“The SafetyNet Attestation API is an anti-abuse API that allows app developers to assess the Android device their app is running on” - Android Docs.
This API is commonly used by many developers as part of their root detection logic. It comes in two parts, basic and cts. The test device will fail the cts check because the device’s bootloader is unlocked. Unfortunately, as part of this process we had to unlock the bootloader. To bypass this, you will need to apply a kernel level patch. Many popular custom kernels such as Paranoid Android or ElementalX have this patch built in. For reference here are the commits for each:
Flar2 (ElementalX): Patch 1 and patch 2
Paranoid Android: Patch 1 and patch 2
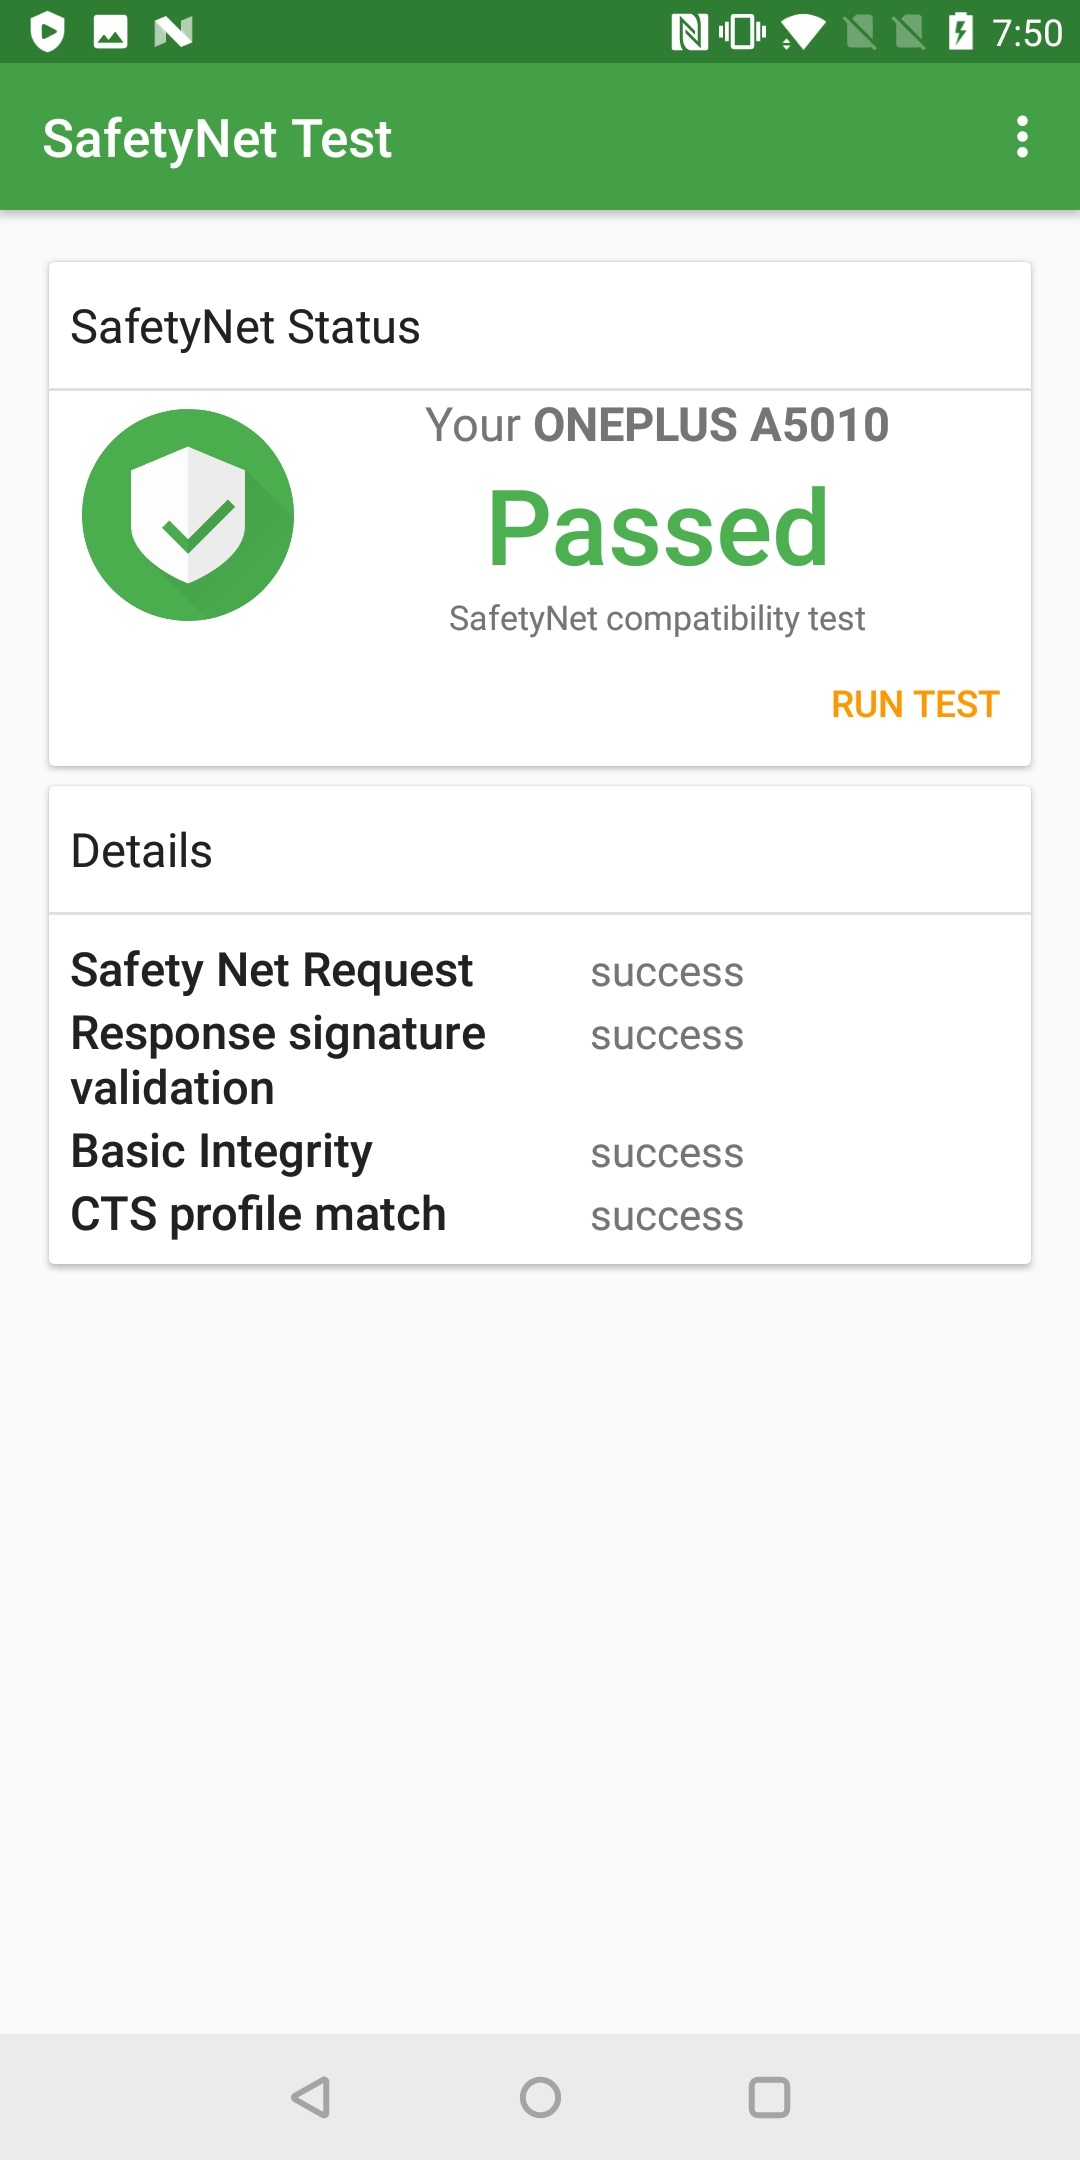
You can either use one of these kernels and it should work, or compile your own custom kernel as I have here. This can then be flashed onto the device the exact same way the patched SuperSU archive was earlier in this post. Once this has been done, the device should pass the SafetyNet checks (tested using the SafetyNet Test app) as seen below.
Conclusion
The content and tools presented in this post should help you create an effective test environment that allows you to focus on what is really important. Instead of wasting precious time bypassing root detection controls and unblocking tools, you can invest time into solving interesting problems. This has been an invaluable time saver for me when testing many applications for bug bounties and CTFs.
With regards to future work, the approach presented in this post could also easily be applied to Magisk. However, the developers have already done a fantastic job with Magisk Hide when it comes to circumventing root detections / system integrity checks. My solution is not effective at scale, whereas Magisk Hide is. A future enhancement I could make is to allow the user to arbitrarily name the su utility, instead of just nu. Although this approach has limited entropy.
Regardless, I hope this approach proves to be as effective for you as it has done for me. Goodluck and happy hacking!
A big shout out and thank you to Eduardo Novella for inspiring this idea.
Useful References
- Inside SafetyNet Series
- MSTG Android Testing Setup
- Magisk
- Magisk Hide
- Magisk Source - Github
- SuperSU
- MSTG Root Detection
- TWRP
- ElementalX Android Custom Kernel
- Paranoid Android Custom Kernel
- My Patched Custom Kernel
- SuperSu Patcher Source